Hosting
Host your website on BTFS via Storage3
To use the Hosting feature of Storage3, you can deploy the decentralized version of your website in Storage3 after being authorized by the GitHub repository. You can update the deploy if there are any GitHub updates in the future.
Concepts
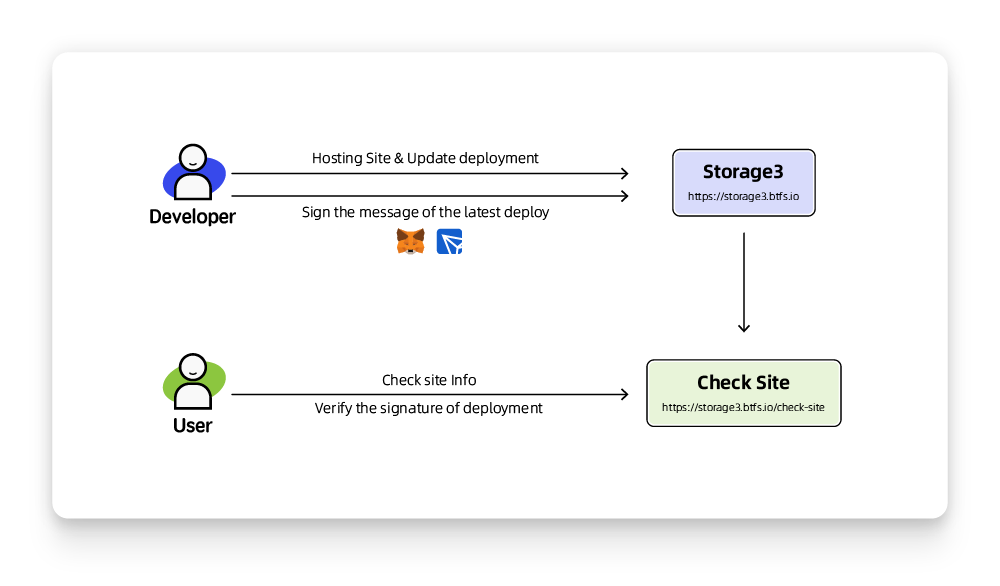
The chart below illustrates major entities in Storage3's Hosting and their relations, which will help you to understand Storage3 hosting better. But of course, you can skip it if you want to.
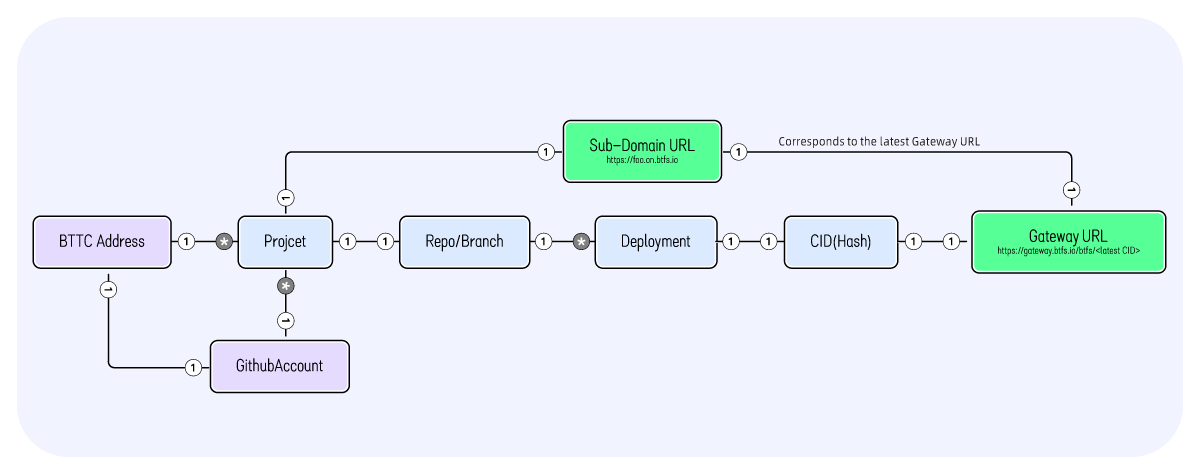
Site Deployment
Connecting to Your Wallet

You need a TRON or BTTC address to start your Storage3 journey.
Go to Storage3's website, click "Enter App", and connect web3 wallet.

Deploy a Site
After logging in, select the Hosting tab, and you can see all your deployed projects here. If there is no project, click Add New Hosting on the bottom to create your first website deploy.
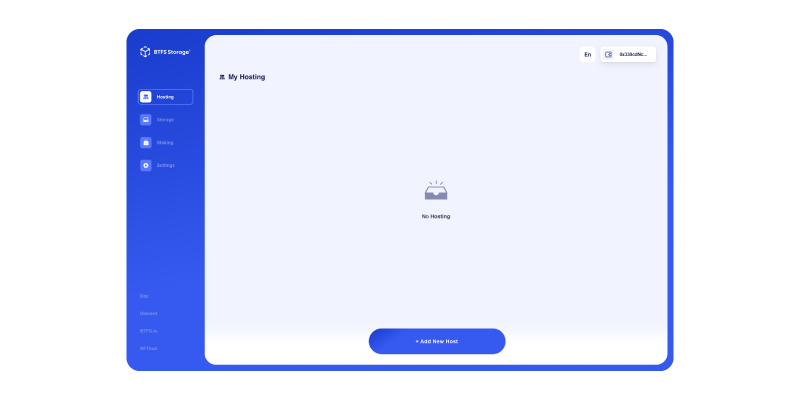
The three steps to deploying a new project are as follows:

1. Connect to Github
Log in and connect to your GitHub account
2. Choose a Repo
Select in your GitHub account the repository you want to deploy
3. Settings & Deploy
Select a branch you want to make the deployment, choose the settings (explained below), and execute the deployment.

Deploy Settings ExplanationFramework —— The preset image configuration, if you need to customize, please select Other.
Docker image Name —— The docker image and tag from the Docker Hub to use as a base when building your site.
Build Command —— The build command to run before deploying. Examples: build, gulp build, make all.
Publish Directory —— The directory to deploy after running the build command. Examples: _site, dist, public.
Base Directory —— The directory which contains the site's source code. Other parameters, such as the build commands, are performed in relation with base directory.
View Projects and Deployments
Project Details
After the first deployment of a project, you can view the project details:
- Info —— including project name, owner, GitHub Repo/Branch.
- Deploys —— which displays all the project's deploys and their status.
- Settings —— in which you can change the site name and delete the project.
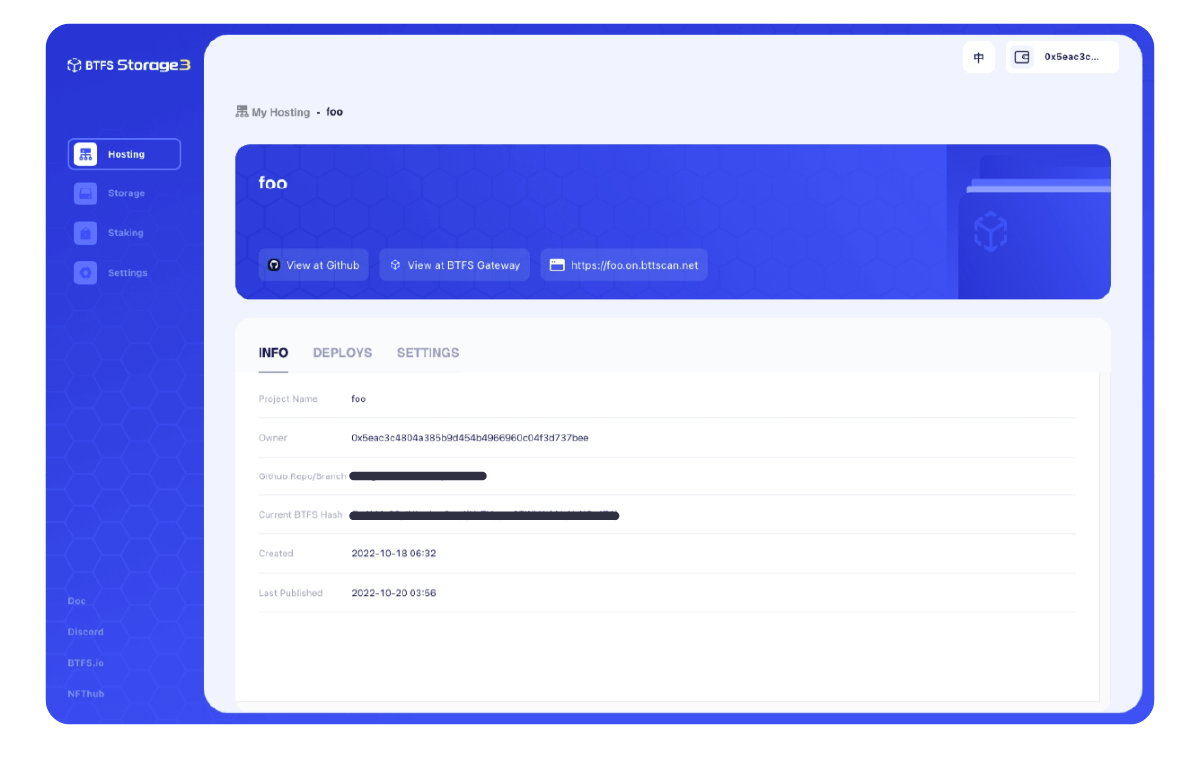
Deployment Details
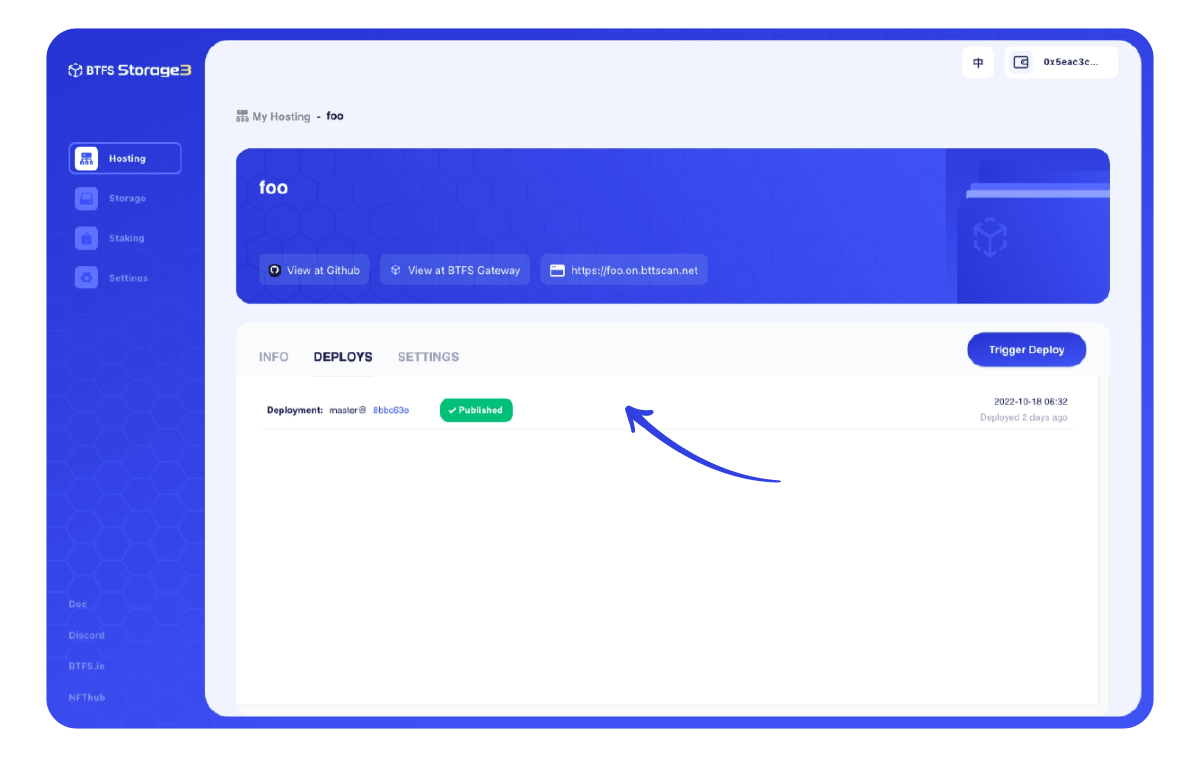
Click any deploy under the “Deploys tab” to view the details, including:
- Status —— Status of the current deploy;
- Log —— Logs generated during the deployment;
- Summary —— Summary information of the deployment.
The following chart presents a full cycle of status change of a deploy.

Site Management
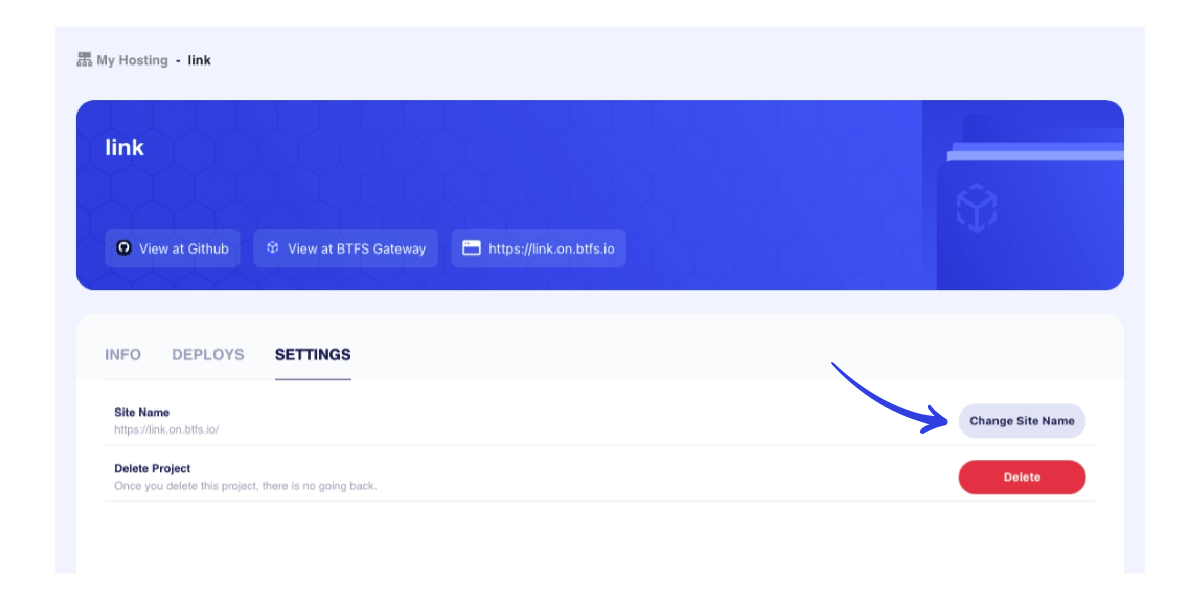
Change Site Name
Users can access your sites via gateway.btfs.io/btfs/{CID} or foo.on.btfs.io which is a more user-friendly domain name.
A random site name will be generated after the first deployment of a project. You can change the site name in Settings .
Update Deployment
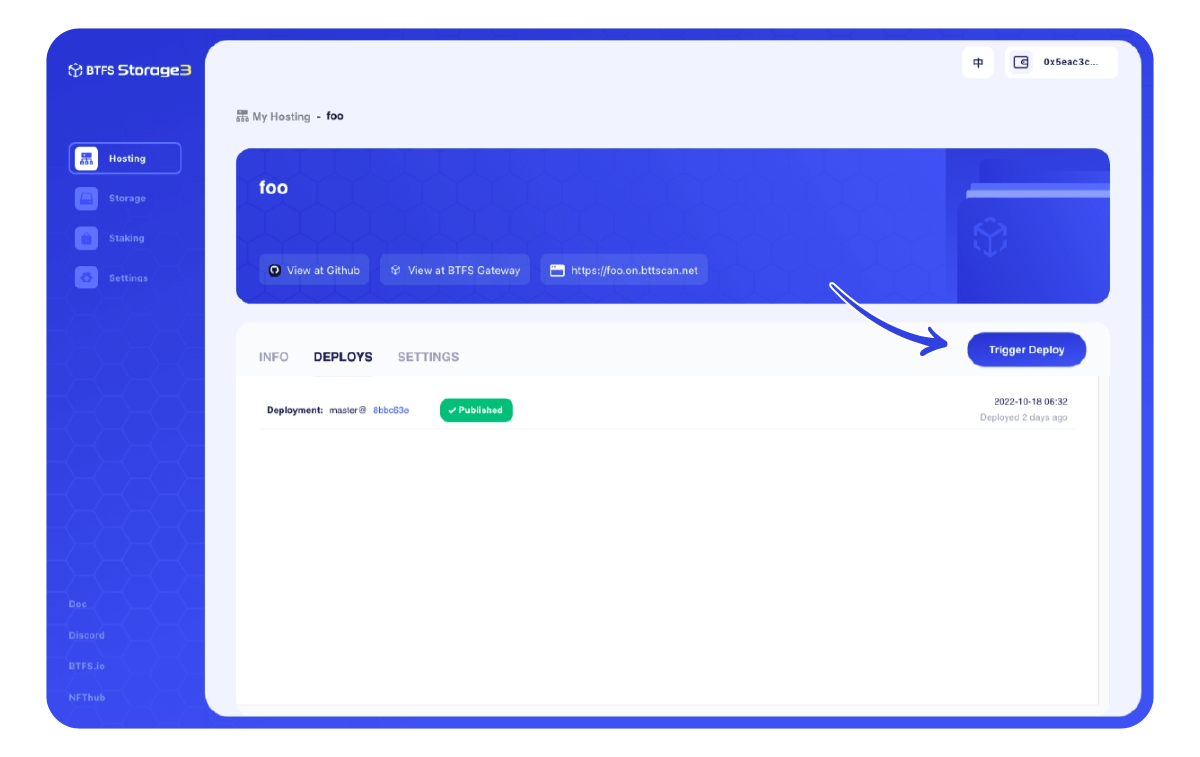
You may want to deploy again when there is an update of your code on GitHub. Click Trigger Deploy under the DEPLOYS tab to update your deploy.
Confirm Latest Deployment
To increase user trust in the published content, it is recommended to confirm the signature after the deployment is completed.
Users can view the basic information and verify the signature of decentralized sites deployed via Storage3 with Check Site service.
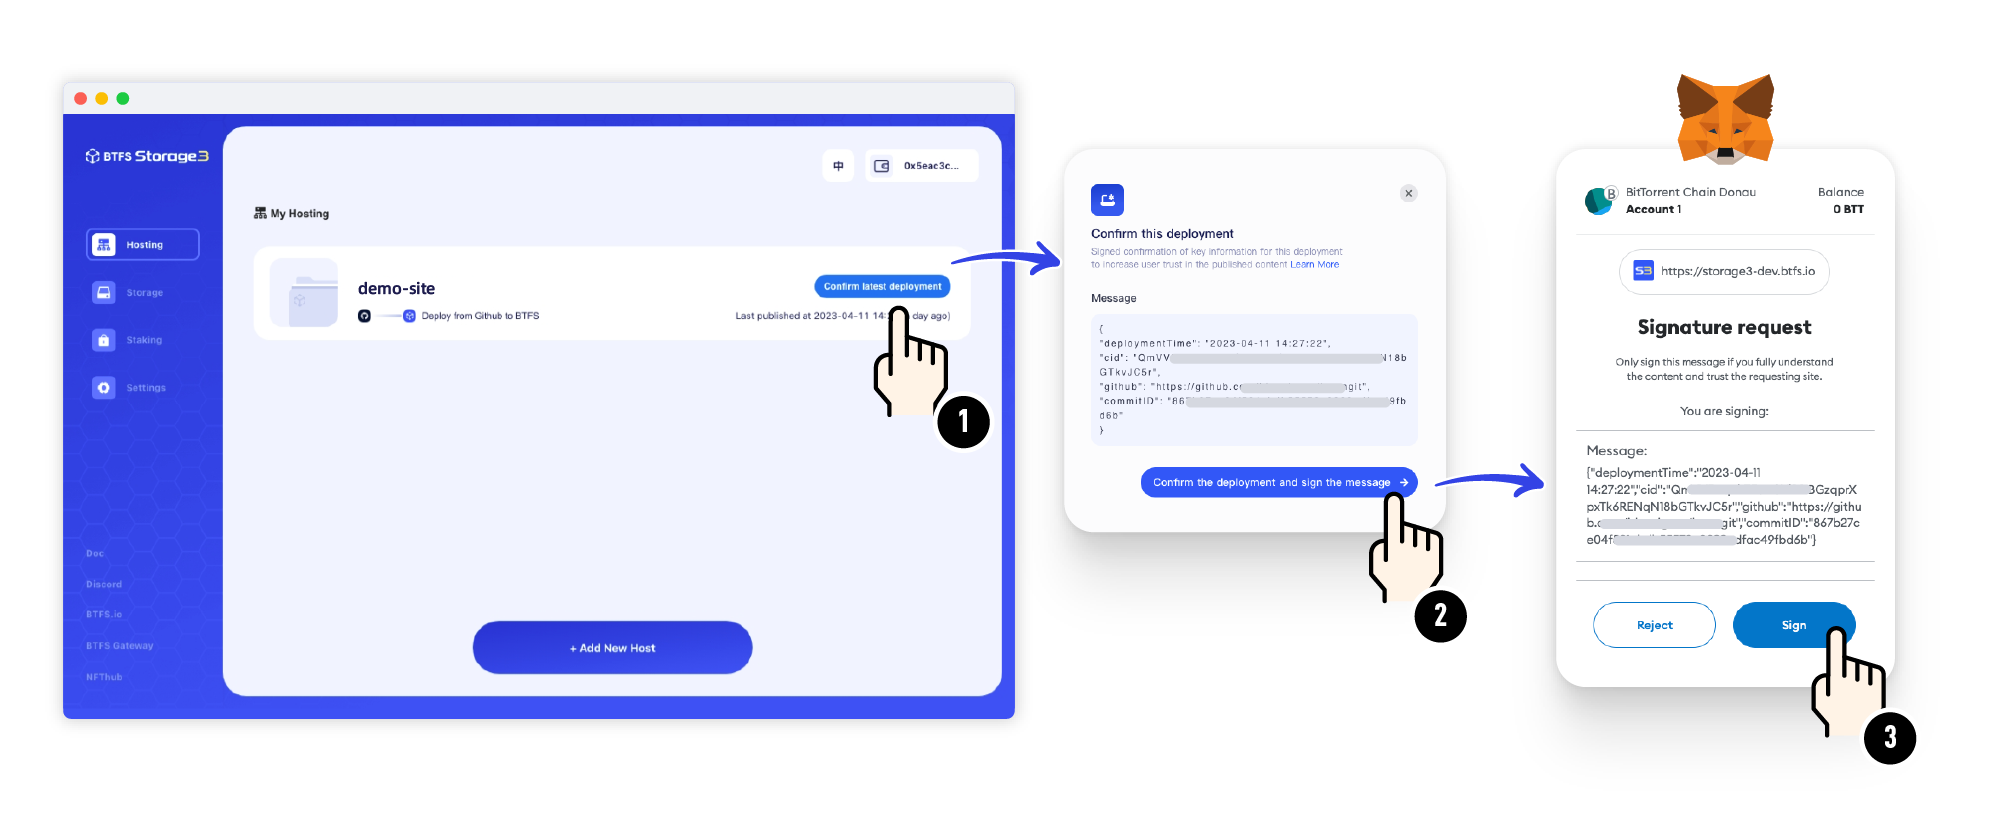
Here are the three steps to complete the signature confirmation(As shown in the picture below):
- Click the "Confirm Latest Deployment" button to view key information about the deployment.
- View and confirm the content of the signed message.
- Use a wallet (MetaMask or TronLink) to sign the message.
Automatic Deployment
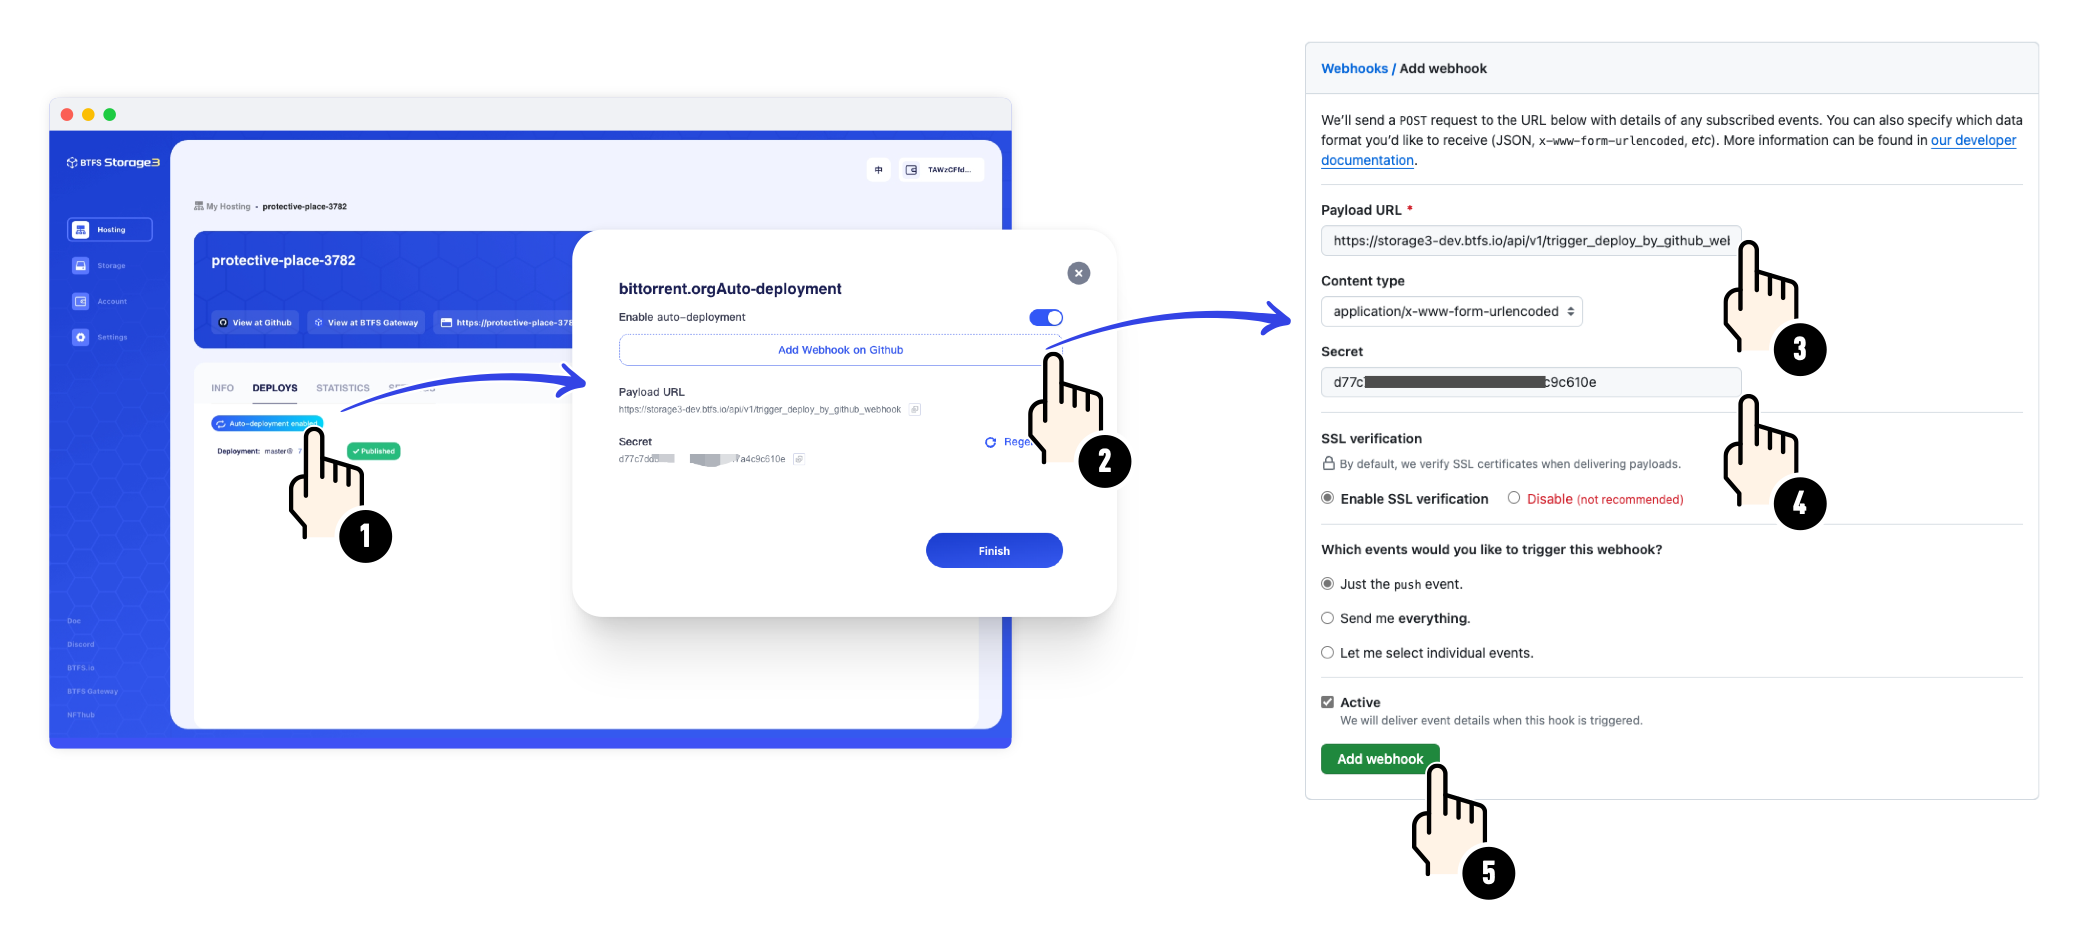
You can enable automatic deployment by adding a webhook on GitHub.
In the GitHub repository Settings corresponding to this project, users can fill in the information provided by Storage3, such as the Payload URL and Secret, to complete the webhook setup.
It is recommended to leave other options as default if you do not understand their meaning.
Once the webhook configuration is complete, any updates to your GitHub repository will trigger Storage3's automatic deployment.
NOTE: Projects with automatic deployment enabled still require manual signature verification
Delete Site
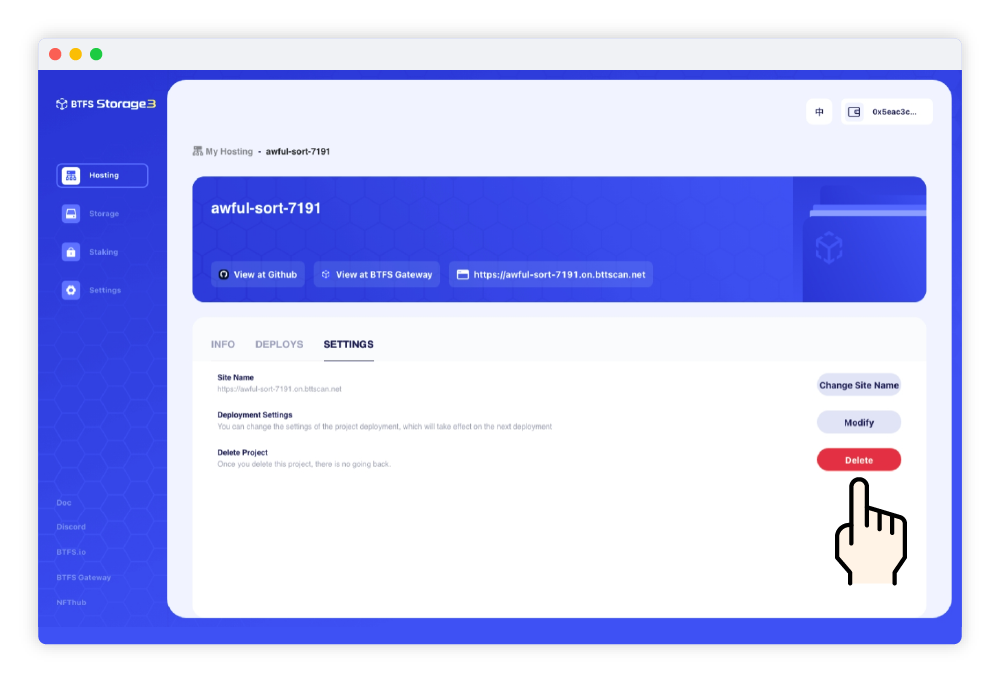
You may delete a site when it is no longer used. Please note that you need to re-deploy the deleted site as it cannot be retrieved once deleted.
Updated 8 months ago
